VW Beetle
Why a VW Beetle Won’t Start When Hot
Use cranking, spark, fuel, coil, starter, wiring, and heat-related symptoms to diagnose why an air-cooled VW Beetle will not restart when hot.
VW Beetle
Use cranking, spark, fuel, coil, starter, wiring, and heat-related symptoms to diagnose why an air-cooled VW Beetle will not restart when hot.
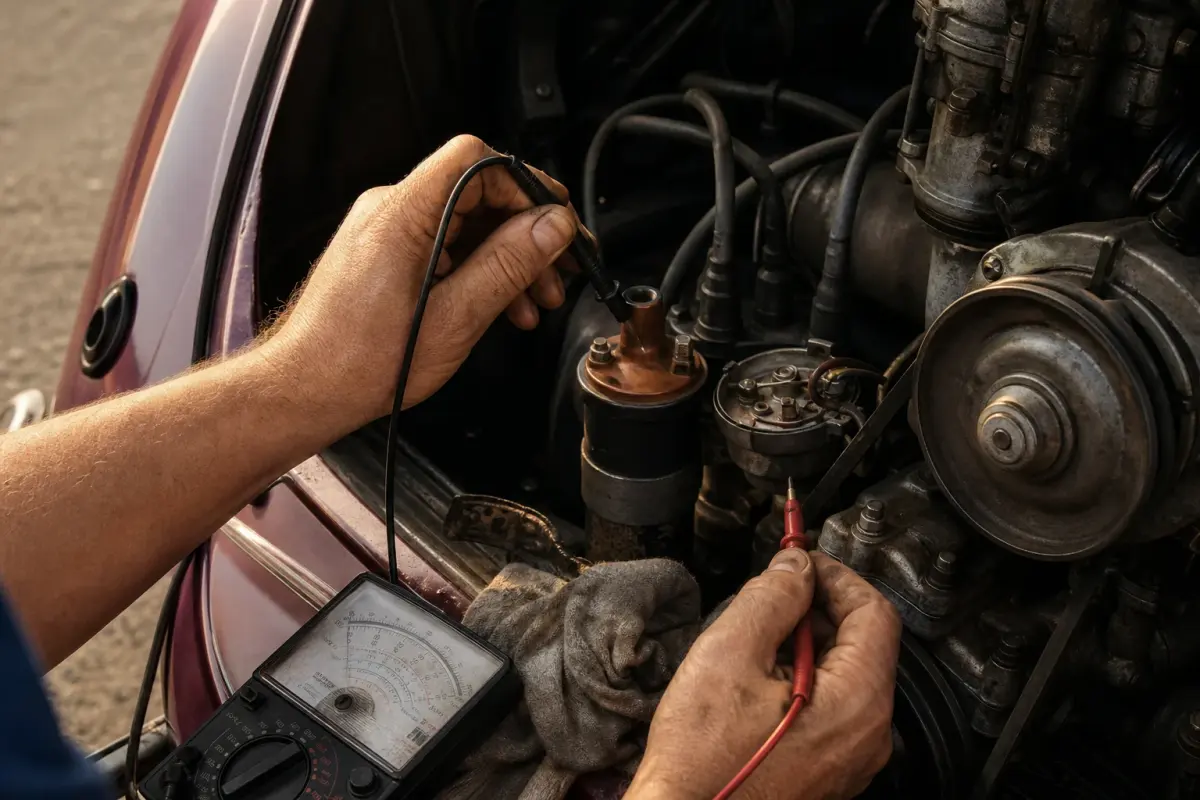
First separate a no-crank fault from an engine that cranks normally but will not fire, then test the affected circuit while the heat-related fault is present.
A hot-start problem can originate in the starter circuit, ignition, fuel delivery, mixture, compression, or another heat-sensitive component. Begin by identifying whether the engine fails to crank correctly or cranks normally without firing, then test that branch while the fault is present.
Listen and observe before changing anything. Silence, one click, slow cranking, normal cranking without firing, and starting followed by immediate stalling point to different branches of diagnosis. Record which condition occurs while the engine is hot so later tests address the actual failure.
Listen and observe when the key is turned. Record whether there is silence, a click, slow cranking, normal cranking, an attempt to fire, or a start followed by immediate stalling. Note warning-light behavior, battery voltage, temperature, time since shutdown, and how long the fault lasts. These details determine the next safe test.
Heat can reveal resistance in aged wiring, connections, switches, grounds, the solenoid, or the starter under load. The battery, ignition switch, wiring, and starter circuit create a long path, so measure voltage drop during the failed-hot condition instead of relying on a cold continuity check.
Common causes include dirty battery terminals, weak battery, loose ground strap, worn ignition switch, tired starter solenoid, or voltage drop in the starter circuit. On manual-transmission Beetles, the starter bushing in the transmission bellhousing also matters. If that bushing is worn, the starter can drag, especially when hot.
Begin with battery state, terminal condition, body and transmission grounds, cable condition, and voltage-drop measurements under cranking load. Test the solenoid command only with a safe procedure. A relay may alter the control circuit in a documented installation, but it must not be used to conceal poor grounds, damaged wiring, an unsuitable switch, or a failing starter.
Check battery state, terminal condition, ground paths, starter-circuit voltage drop, ignition-switch output, solenoid command, starter condition, bushing, cable size, and engine mechanical resistance. Heat can expose resistance that is less obvious when cold. Do not bypass terminals in an unsafe location or assume that adding a relay corrects every underlying fault.
When cranking speed is normal, check ignition and fuel behavior while the fault is present. Do not label the symptom vapor lock until testing distinguishes loss of spark, interrupted fuel delivery, flooding, mixture, compression, or an incorrect starting procedure for the installed carburetor and engine.
Use the starting procedure specified for the installed carburetor and engine. Repeated pumping changes the mixture and can make diagnosis harder, while an incorrect throttle position can also affect a flooded or fuel-starved engine. Record what the engine does before changing the input.
If flooding is suspected, stop repeated cranking and work from the relevant service procedure. Keep fuel vapor away from sparks and hot surfaces, ventilate the area, and inspect the cause only when it is safe. Do not treat one starting technique as correct for every carburetor or fault.
A normal cranking speed shifts attention to ignition, fuel delivery, mixture, compression, and the conditions immediately after shutdown. Confirm whether the engine has spark and appropriate fuel behavior while the fault exists. Waiting until it cools can erase the evidence. Avoid pumping or repeated cranking that changes the symptom before testing.
Use a safe spark tester and follow the service procedure for the installed ignition. Check coil supply during cranking, trigger operation, the primary circuit, cap, rotor, leads, plugs, and connections while the fault is present. Keep every ignition test away from fuel vapor.
If spark is absent or unstable, compare the failed-hot measurements with the same circuit when cold. Do not replace the coil or condenser solely because it is warm; a supply, switch, ground, trigger, or connection fault can produce a similar symptom.
An ignition coil, condenser, trigger, connection, rotor, lead, or other ignition component can fail when heated and operate again after cooling. Compare supply, trigger, and spark behavior in the failed-hot condition with the same checks made when the engine starts normally.
A heat-sensitive ignition fault may produce normal cranking with no usable spark, then disappear after the engine cools. Test supply voltage, trigger operation, coil behavior, and the secondary ignition while the failure is present.
Check spark while the failure is present, because a heat-related fault may no longer be measurable after the car cools. Use an inline spark tester if possible. Also check that the coil is receiving voltage at terminal 15 with the key on and while cranking. If voltage disappears during cranking, the problem may be the ignition switch or wiring, not the coil itself.
Do not diagnose a coil only by touching it. Coils get warm. “Hot” is not a measurement. Use measured spark and voltage results rather than judging a coil by touch.
Also, never leave the ignition switched on for long while the engine is not running. On points ignition, that can overheat the coil if the points are closed.
Heat can reveal an internal coil, condenser, electronic module, connection, or resistance fault. Measure supply and resistance only with the correct procedure and specifications, and compare cold and failed-hot conditions. Inspect for leakage, cracks, loose terminals, unsuitable coil or ballast combinations, and overheated wiring. Replace a component only when testing or evidence supports it.
Fuel can vaporize before reaching the carburetor, boil or percolate after shutdown, drain from the bowl, or flood the intake; those conditions are related but not identical. Identify whether fuel is absent, excessive, or delivered incorrectly before changing hose routing, pump, pressure, float, needle valve, insulation, or carburetor settings.
Signs of fuel starvation include normal cranking, little or no fuel smell, no accelerator-pump squirt when you move the throttle, and the car restarting after it cools.
Possible flooding signs include a strong fuel smell, visible fuel where it should not be present, dark exhaust smoke when the engine starts, and a repeatable change in starting behavior with throttle position. Interpret those observations against the installed carburetor and service information.
Inspect fuel behavior only with the engine stopped, adequate ventilation, fire controls, and the service procedure for the installed system. Keep ignition sources away, avoid spilling fuel on hot components, and do not create an open fuel test when the location or available equipment makes it unsafe.
Check hose and hard-line routing, fuel compatibility, fittings, pump operation and pressure, tank outlet, carburetor float and needle valve, choke position, and engine-bay sealing. Correct only the verified fault. A replacement hose, pump, spacer, or carburetor part is not a universal hot-start repair.
Inspect fuel routing, pump operation, carburetor behavior, float level, insulation, engine-bay sealing, and temperature-related boiling or flooding. Work with ventilation and fire controls, and never create a spark near fuel. A braided fuel hose is not a diagnosis or guaranteed cure; hose, fittings, routing, and fuel compatibility must be correct.
Clean and tighten the battery connections, body and transmission grounds, starter cable, ignition feed, fuse connections, and relevant terminals. Measure voltage drop under the failed-hot load instead of relying on an unloaded continuity test. Old switches, connectors, repairs, and added accessories can produce resistance that rises with heat and reduces voltage where it is needed.
Use Bosch’s earth-connection and polarity guidance as general electrical context, then apply the correct Volkswagen service procedure and specifications to the installed car.
A single click, slow cranking, or no cranking after a hot stop points the diagnosis toward the battery, cables, grounds, switch command, solenoid, starter, bushing, engine resistance, and voltage available under load. Heat may make an existing resistance or component fault easier to reproduce.
A correctly engineered relay can change how the starter-solenoid control current is carried, but it is not a universal repair. Confirm battery condition, grounds, cables, switch output, voltage drop, starter compatibility, and the failed component before changing the circuit.
On a converted car, document the starter, solenoid, bushing, flywheel, ring gear, battery, cables, and control circuit as one starting system. Confirm physical and electrical compatibility rather than assuming a previous conversion was completed coherently.
If voltage and grounds are correct but hot cranking remains poor, inspect the starter, solenoid, bushing, engagement, cable, and engine resistance. Confirm the starter and flywheel arrangement are compatible. Bench testing can miss a heat-related or loaded fault. Use safe lifting and isolation procedures and seek specialist testing when access or diagnosis is uncertain.
Reproduce the fault safely; classify no-crank or crank-no-start; record battery and warning-light behavior; measure cranking voltage and voltage drop; test spark and coil supply; inspect fuel behavior without creating an ignition risk; then check compression or mechanical condition if needed.
A hot-start symptom does not identify its own cause. Avoid replacing parts until testing distinguishes cranking speed and voltage drop from loss of spark, fuel starvation, flooding, or another condition that appears only when the engine is hot.
Start with the exact symptom and test while the problem is present. Correct verified connection, voltage, starter, ignition, fuel, mixture, or mechanical faults before considering optional changes. Record the failed-hot measurements and repeat the same restart test after the repair.
A new battery, coil, starter, hose, carburetor part, or relay can hide the symptom temporarily without correcting the underlying cause. Read the overheating guide if excess temperature is part of the complaint, and use a Volkswagen specialist when safe testing cannot isolate the fault.
First decision
Observe the fault while it is present. The first branch prevents unrelated parts from being replaced.
| Observed symptom | Begin with | Then test |
|---|---|---|
| Starter does not crank normally | Battery state, terminals, grounds, cable condition, starter circuit, and voltage drop during the fault. | Switch and solenoid path, starter and bushing condition, heat at connections, and the year-specific circuit. |
| Engine cranks but does not fire | Spark and fuel checks made while the hot fault is present. | Coil and ignition components, fuel delivery and heat soak, mixture, and evidence of flooding or starvation. |
References
Use the source that matches the vehicle, year, installed parts, and location. A general guide cannot replace the correct service information or an inspection of the individual car.
Volkswagen’s record of electrical and model changes that make year-specific diagnosis necessary.
Official repair-guide archive for specified Volkswagen Type 1 and Beetle model ranges; use only the guide that matches the individual vehicle and year.
Component-manufacturer guidance for separating starter-circuit symptoms from other no-start conditions.
Fitment support
Tell us your Volkswagen model, year, and the part you are considering.
Related parts
See parts related to this guide and ask about fitment before checkout.
Browse matching partsContinue reading
Share your VW model, year and part, or include your order number.
Start a new chat for another question. Our support team will still have the closed conversation.